


Do-it-yourself wood floor sanding: restore the beauty of your floor
Repair scratches, chips, and uneven wood floors with sanding. Find out how to do the process yourself and when it's best to turn to professionals to achieve the perfect result.
Content
- What tools and materials will be required to carry out this work
- Step #1. Level and repair the floor
- Step #2. Scrubbing, which is rough sanding of the floor
- Step #3. Spackle the floor
- Step #4. Sand the floor
- In what cases it is recommended to turn to professional craftsmen for sanding wooden floors
- Frequently Asked Questions
- ❓How often should a wood floor be sanded?
- ❓How long does the wood floor sanding process take?
- ❓What kind of sand paper should be used?
- ❓Do I need to use protective equipment during sanding?
- ❓How to take care of the sanded floor after the procedure?
Over the years, wooden floors are subject to aging, dirt penetrates the planks, unpleasant scratches and chips appear, and heavy cabinets leave unsightly dents on them. In order to restore the floor to its original beauty, a series of works including scraping and sanding must be carried out. This will remove the top layer of wood along with the old finish, and then carefully sand each board.
In our article, we will tell you how to perform these processes yourself and tell you when it is best to seek professional help.
What tools and materials will be required to carry out this work
Sanding tools are an integral part of the process of sanding and polishing various surfaces. They provide the opportunity to achieve a high level of finish and create an attractive appearance of surfaces. When selecting sanding tools, it is important to consider their features, performance and cost to get the best results.
- One of the most popular tools for rough sanding is the sander. It is highly productive and is designed to remove irregularities and surface imperfections. A coarse grinder has various attachments and grinding wheels that allow you to effectively process different materials such as wood, metal, and plastic. Thanks to its power and functionality, it is an indispensable tool for preparing surfaces before subsequent finishing.
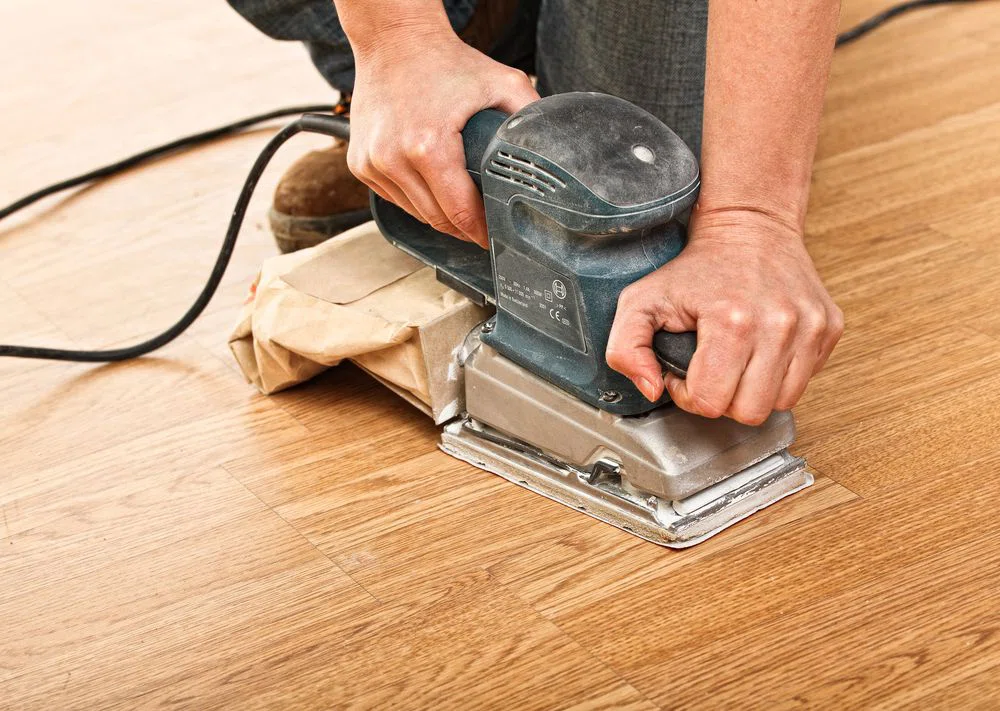
- In addition, for the finish leveling of floors, a surface grinder is widely used. It is a specialized tool that can provide high accuracy and smoothness of grinding. Flat grinder is equipped with various abrasive nozzles and disks, which allow you to achieve a perfectly even surface of the floor. Such a tool is especially useful when working with parquet or wood flooring, where high quality and precision finishing is required.
- When it is necessary to process floors in hard-to-reach places, for example, under radiators or corners of the room, you can use a curb sander. This special tool is compact in size and flexible to reach hard-to-reach areas. The curb sander is equipped with special attachments that allow you to effectively process narrow and curved surfaces. Thanks to this tool, the sanding process becomes more convenient and efficient.
- However, it is important to remember that when working with grinding tools, it is necessary to take safety measures. Respirators, noise-reducing earmuffs and protective gloves are an essential part of personal protection when using these tools. Respirators help prevent the inhalation of dust and harmful particles, while noise-reducing earmuffs protect hearing from the noise generated when operating the grinders. Protective gloves keep your hands safe and prevent possible injuries.
- For best results when sanding and polishing surfaces, it is also important to choose the right materials. Putty is one of the key materials for filling gaps in wood surfaces. It allows you to hide irregularities and defects, creating a smooth surface for further finishing. PVA glue is also an indispensable material when working with parquet, providing a strong bond between wooden elements and the base. Flexible trowel allows you to evenly apply putty or glue to the surface, ensuring high accuracy and quality of work.
- An important part of the final stage of sanding is the choice of finish coating. Lacquer, paint or olive oil - each of these materials has its own advantages and aesthetic characteristics. Lacquer provides reliable protection of the surface from external influences and gives it a glossy or semi-matte look. Paint allows you to create various design effects and color solutions, bringing individuality to the interior. Olive, in turn, gives the surface a natural matte look and preserves the natural texture of the material.
The cost of grinding tools can vary considerably depending on their quality and functionality. Instead of purchasing tools for one-off jobs, it is often more cost-effective to use the services of specialized grinding tool rental services. This allows you to save money and gain access to professional tools without having to purchase them.
Step #1. Level and repair the floor
Before starting the process of floor sanding, it is necessary to prepare the floor according to the following steps:
- Removal of skirting boards.
- Nails and self-tapping screws that strengthen the floor should be driven to a depth of at least 2-3 mm to avoid damage to the sanding equipment and the risk of cutting your hands.
- Leveling all boards to the same level. Over time, some of them may fail, causing unevenness. If this happens, it is necessary to remove these boards and inspect the adjoining joists as they may be prone to rot. If this is the case, replacements will have to be made.
- Damaged boards that are not suitable for repair should be replaced with new ones. For example, if deep cracks, chips or drilled holes are found on them.
- If the gap between the boards exceeds 7 mm, it is necessary to carefully lift them, carefully fitting them to each other, and then replace one of the boards. Do not try to fill such gaps with putty, as it is ineffective.
- After eliminating the identified defects, the floor should be thoroughly vacuumed and washed to get rid of debris and dust that may interfere with subsequent work.
When it comes to leveling the floor, there are a number of additional important points to consider.
Installation of adjustable anchor points: To achieve a perfectly level floor surface, we recommend the use of adjustable anchor points. They allow you to adjust the height of the floor, leveling it according to the characteristics of the substrate and additional requirements. In this way, you can create a perfectly smooth floor surface with no visible irregularities.
Using specialized leveling solutions: there are various specialized floor leveling materials available on the market today. These can include self-leveling compounds that are easy to apply and have a high degree of precision and reliability. Such solutions allow you to quickly and effectively eliminate any irregularities and defects in the floor surface, providing an ideal base for sanding.
Advantages of using specialized tools: To achieve optimal results in the floor leveling process, it is recommended to use specialized tools. For example, laser levelers allow you to precisely control the height and evenness of the floor, ensuring a high degree of accuracy in your work. This helps to avoid mistakes and ensure that the surface is as even as possible before sanding.
Subfloor repairs: if serious defects are found in the subfloor, such as rotting, structural damage or unevenness, it is recommended that repairs are made before leveling the main floor. This will provide a strong and stable base for further work, as well as prevent potential problems in the future.
By taking all of these factors into account, the process of leveling and repairing the floor becomes more efficient and durable, preparing the foundation for subsequent sanding, finishing, and flooring installation.
Step #2. Scrubbing, which is rough sanding of the floor
Scraping is an essential stage of repair work when the floor is badly damaged. It consists in removing the top layer of wood, which is up to 5 mm thick. To perform cycloving, a grinding machine is used, which is installed abrasive element with a certain grain size, which can vary from 40 to 80 units.
The choice of abrasive grit depends on the condition of the boards and their coating. The value on the marking of the abrasive indicates its roughness: the smaller the value, the coarser the abrasive and the thicker the layer that will be removed from the surface of the floor.
If the board is thick and the floor is covered with several layers of paint or varnish, there are a lot of scratches and deeply embedded dirt on it, it is recommended to use an abrasive with a grain size of 40 to 50 units. If the board is thin, and the scratches on the surface are not very deep, you should choose an abrasive with a grit of 70 to 80 units.
When sanding a wooden floor with a machine, it is necessary to move strictly along the boards. Transverse movement is allowed only in places where the machine turns, for example, at the wall.
Especially hard-to-reach places, such as areas under radiators, require a special approach. To process these areas, use a special curb scraper.
After completing the work, it is recommended to vacuum and mop the floors thoroughly to remove any residual dust and dirt. Then the floors should dry for a day. This time is necessary to allow the putty to set well.
However, it is important to remember that scraping can have an aesthetic function as well as a practical purpose. In the process of sanding, you can give the floor a new look, emphasize its natural beauty and texture. The wood gets a smooth surface, which is pleasant to the touch and creates a feeling of warmth and comfort.
In addition, there are many options for finishing the floor after cycloving. You can choose a natural oil, varnish or wax that will help preserve and protect the wood for a long time. These materials will not only improve the appearance of the floor, but also ensure the longevity and reliability of its operation.
Also, don't forget about the importance of proper maintenance of the floor after cycling. Regular cleaning and refreshing of the protective coating will keep your floor in top condition for many years to come.
Step #3. Spackle the floor
After scraping the wooden floor, it is necessary to carefully seal all holes and gaps between the boards with special filler or PVA glue designed for parquet. This important stage of floor treatment guarantees its longevity and aesthetic appeal.
Putty is an integral part of repair work and provides an even surface of the floor. Properly selected filler helps to hide the imperfections of a wooden floor, such as cracks, chips or unevenness, creating a pleasant feeling of smoothness and flawlessness. It also serves as a protection against moisture and dust, preventing them from penetrating into the wood crevices and ensuring that the floor stays in place for years to come.
Before starting to putty the floor, you should prepare the surface by freeing it from dust, dirt and remnants of old finishes. It is recommended to thoroughly clean the floor using a soft brush or vacuum cleaner. This will ensure better adhesion of the putty material and allow it to firmly fix itself on the surface.
The choice of filler material depends on the condition of the floor and the requirements for its appearance. Acrylic and polyurethane fillers are the most common for wood floors. Acrylic fillers have high elasticity and good adhesion to wood. They are ideal for filling small cracks and chips. Polyurethane putties are more durable and resistant to stress. They produce a smoother surface and can be used to fill wider gaps and damage.
Before applying the putty, it should be mixed well until a homogeneous consistency is obtained. Then, using a plastic or metal trowel, evenly apply the putty to the floor surface, filling all irregularities and holes. When working with a wooden floor, it is recommended to apply putty across the direction of the boards to fill all the gaps between them.
After applying the putty, give it enough time to dry. This usually takes several hours or even days, depending on the type and thickness of the putty and the conditions in the room. It is important to follow the manufacturer's recommendations for drying time and not to stress the floor until this process is complete.
Once the putty has dried, you can proceed to the next stages of floor finishing, such as sanding, applying a protective coating or painting. Properly performed puttying will allow you to achieve high quality and aesthetic appeal of the floor, giving it durability and elegant appearance.
It should be noted that floor puttying is a process that requires some skill and experience. If you are not confident in your abilities or in the case of complex floor damage, it is recommended to contact specialists who will be able to carry out puttying qualitatively and professionally.
Step #4. Sand the floor
After the putty has finished drying, it is necessary to start sanding the floor. This important procedure ensures the achievement of a perfectly smooth surface. Sanding requires special equipment, namely a surface grinder with an abrasive element whose grain size plays a key role in achieving the desired result.
The choice of abrasive element depends on several factors, including the desired surface smoothness and the required performance. The optimal grit range for an abrasive element is between 100 and 240 grit. The higher the grit value, the smoother the surface can be achieved, but will require more time and effort. Experienced craftsmen usually choose the most suitable abrasive element, taking into account the condition of the floor and the requirements for the final result.
The technology of floor sanding is in many ways similar to the process of cycloving. However, sanding is usually carried out after puttying, when the surface is already leveled and prepared to achieve the smoothest possible condition. It is important to remember that sanding must be done with care and consistency to avoid damage to the floor and achieve the desired quality.
After thorough sanding, the floor should be cleaned of dust. It is recommended to use a vacuum cleaner or other means of dust removal for this purpose. Then, the floor surface should be washed using special detergents and water. After washing, it is necessary to let the floor dry completely before applying further finishing coatings.
After completing the process of sanding and preparing the floor, you will have to choose a further finish that will emphasize its beauty and durability. One option is to cover the floor with varnish, which will give it shine and protection from external factors. You can also consider painting the floor, which will create a unique and stylish image of your interior.
It is important to note that the choice of finish depends on your preferences, functional requirements and the overall design of the room. Consulting with professionals in the field can be helpful to get the best results and lasting beauty for your floor.
In what cases it is recommended to turn to professional craftsmen for sanding wooden floors
Sanding wooden floors is a process that requires certain skills and experience. In a number of situations, it is highly recommended to call in professionals who have the necessary knowledge and tools to perform this type of work. Let's take a look at a few cases when it's best to call in the professionals for floor sanding.
- If you are unable to find the right tools for rent. Sometimes it can be difficult to find certain sanding tools for rent, especially if they are not widely available in your area. That said, buying such tools may not be cost-effective if you only plan to use them a few times over the course of a few years. In such a case, it's wise to call in the experts who already have all the tools you need.
- If your floor has large gaps or many damaged boards that need to be replaced. Sanding floors with such defects may require serious carpentry skills and experience. Professionals will be able to assess the extent of the damage, determine if the planks need to be replaced, and perform the work to the highest quality.
- If your floor is made of high-value wood. Expensive wood floors require special attention and careful handling. Mistakes in the treatment of such floors can lead to serious financial losses. Therefore, in case you have a parquet made of valuable wood species, the best solution is to contact specialists who are experienced in working with such materials.
The standard price for floor sanding depends on the complexity and amount of work that needs to be done. For example, if the floor has irregularities, cracks and scratches everywhere, and serious repairs are required, the services of professionals may cost more.
In addition, it is worth remembering that there are advantages to contacting wood floor sanding professionals. First, they have the experience and knowledge to perform the work qualitatively and efficiently. Secondly, they usually use professional tools and techniques, which allows them to achieve a higher level of finish. In addition, professionals can offer advice on how to care for your floor and recommendations on how to extend its lifespan.
Don't forget that quality floor sanding can greatly improve the overall look and condition of your home. Professionally done floor sanding and refinishing work creates a pleasant atmosphere and gives the room a cozy and attractive feel. Therefore, when it comes to sanding wooden floors, it is worth contacting experienced craftsmen to get the best results.
Frequently Asked Questions
❓ How often should a wood floor be sanded?
⭐️ The frequency of sanding depends on the wear and tear of the floor and individual preference. It is generally recommended to sand every 5-10 years or when there is visible damage.
❓ How long does it take to sand a wood floor?
⭐️ The time it takes to sand a floor depends on its size and condition. It usually takes anywhere from a few days to a week.
❓ What kind of sand paper should be used?
⭐️ For initial coarse sanding, coarse grit sandpaper (e.g. P40-P60) is recommended, and for subsequent stages of fine sanding, finer grit sandpaper (e.g. P80-P120) is recommended.
❓ Is it necessary to use protective equipment during sanding?
⭐️ Yes, when sanding wood floors, it is recommended to use safety goggles, mask and headphones to protect eyes, breathing and hearing from dust and noise.
❓ How do I care for a sanded floor after the procedure?
⭐️ After sanding, it is recommended to remove all dust and finish the floor with varnish or oil to protect it from damage and give it a shine.


2 comments
Log in to leave a comment