


House Renovation Cleaning: Effective Tips and Steps
Understanding how to clean up after the completion of the repair of the cottage. Useful tips and sequence of actions for efficient cleaning.
Content
- Making a detailed plan for effective cleaning
- Preparing for cleaning: selecting the necessary tools and equipment
- Getting rid of trash as well as unnecessary items
- Dusting all surfaces after renovation: secrets and pitfalls
- Washing and cleaning
- Roof: gives a finished look
- Chandeliers, light fixtures, switches, sockets: safety first
- Wall: different decorative surfaces cleaner.
- Tile: clean and beautiful
- Furniture and bathroom fixtures: bringing back the shine and comfort
- Windows, doors and mirrors: transparency and radiance
- Floors: neat and efficient cleaning
- Air purification: get rid of dust and odors
- Removing stains and specific contaminants: effective methods and benefits of professional cleaning services
- The decision to self-clean or hire professionals should be based on a number of factors
- How to create a truly cozy nest after renovation
- Principle of operation of storage services in Georgia
- The pros of storing things in warehouses
- Steps for quick and efficient cleaning after renovation
- Frequently Asked Questions
- 🧹 What steps should I take to clean up after a cottage renovation?
- 🧹 What materials and tools will be needed for cleaning after a renovation?
- 🧹 How to effectively remove construction dust?
Post-renovation syndrome is a condition that a person experiences after completing the renovation of his apartment, when there is no joy and energy for cleaning. At such a moment it seems that all efforts were in vain. To understand this state, it is not necessary to be a psychologist, it is enough to do the repair once yourself and realize that it takes twice as long and requires twice as much effort than it seems initially. Once the renovation is complete, there is often no energy left for such an important part of the process as cleaning. Our mood depends on how the cleaning will be done: if everything is done correctly, we will find ourselves in a fresh and cozy renovated apartment, feeling joy and comfort. In this article we will tell you how to achieve this.
Make a detailed plan for effective cleaning
Before you start cleaning, it is important to develop a sequence of actions and logic of work. Only in this way can you achieve effective cleaning, save time and effort. By following this plan, you will be able to successfully cope with the cleaning:
- Don't forget to rest before cleaning: Don't rush into cleaning as soon as you've completed your last renovation. Take time to rest, sleep, and reenergize. This will dry paint, remove dust, fix glue and put all items back in place.
- Make a plan of action: to make cleaning more organized, write down the sequence and duration of each action on paper or on your phone. This will help you stay on track and in control of the process.
- Buy the materials you need: before cleaning, make sure you have all the materials and tools you need. Think about what you need, such as cleaning supplies, rags, and trash bags, and buy them ahead of time.
- Debris removal during construction: depending on the amount and type of debris, you can do it yourself or hire a company that specializes in debris removal. Remember to properly dispose of construction debris.
- Dispose of household waste: collecting household waste is an important part of the cleanup. Dispose of it separately from construction debris and in accordance with local codes and regulations.
- Wet cleaning of surface dust: Start cleaning the surface with a damp cloth or special cleaners. Remove dust and dirt, paying attention to details and corners.
- Removing stubborn stains. If you're dealing with stubborn stains on walls, floors and furniture, look for methods and products that will help remove them effectively. Some stains require a special approach and specialty products.
- Window Cleaning. Windows play an important role in creating a comfortable indoor environment. Thoroughly clean both sides of the glass with the right cleaner and tools. Thoroughly clean the window structure, paying attention to the sills and window sills.
- Cleaning wet floors: Depending on the type of floor (parquet, carpet, etc.), use an appropriate cleaning method such as a vacuum cleaner or mop. Remember that different surfaces require different care.
- Polishing mirrors and glass. Mirrors, glass surfaces and glassware add shine and clarity to a room. Use special detergents and homemade recipes to remove stains and create a spotless look.
- Lighting Cleaning: chandeliers, candles and other lighting fixtures should be cleaned regularly. Gently remove dust and dirt with a soft cloth or brush. Observe safety precautions and turn off the power before starting work.
- Upholstery cleaning: if you have fabric furniture in your room, include this item in your cleaning plan. Use a vacuum cleaner with the right attachment to remove dust, leather, and other dirt from couches, chairs, and other upholstered surfaces.
- Arrange the furniture: After the general cleaning, arrange the furniture in its place. This helps to create a comfortable and functional environment.
Choosing the correct order of operations is very important. If the order is wrong, you may have to redo your work. Dust will accumulate again, window cleaning may be required, and you may run out of tools and cleaning products. So follow the above recommendations for the best cleaning results.
Preparing for cleaning: choosing the right products and tools
For successful cleaning before or after renovation, the following products and tools should be purchased or prepared in advance:
- Heavy Construction Debris Bags: used for packing bulky construction debris that needs to be disposed of immediately after renovation. Spread the debris evenly in the bag so that it does not tear during discarding. If the trash can is empty, you can reuse the cloth bag by throwing its contents into the trash can and replacing it with a new bag.
- General garbage bags: these bags can be used to collect common household waste that accumulates during cleaning.
- Floor cleaning brushes and mops: these tools clean dust, dirt and other contaminants from floors. Choose the right brush and mop for your floor type.
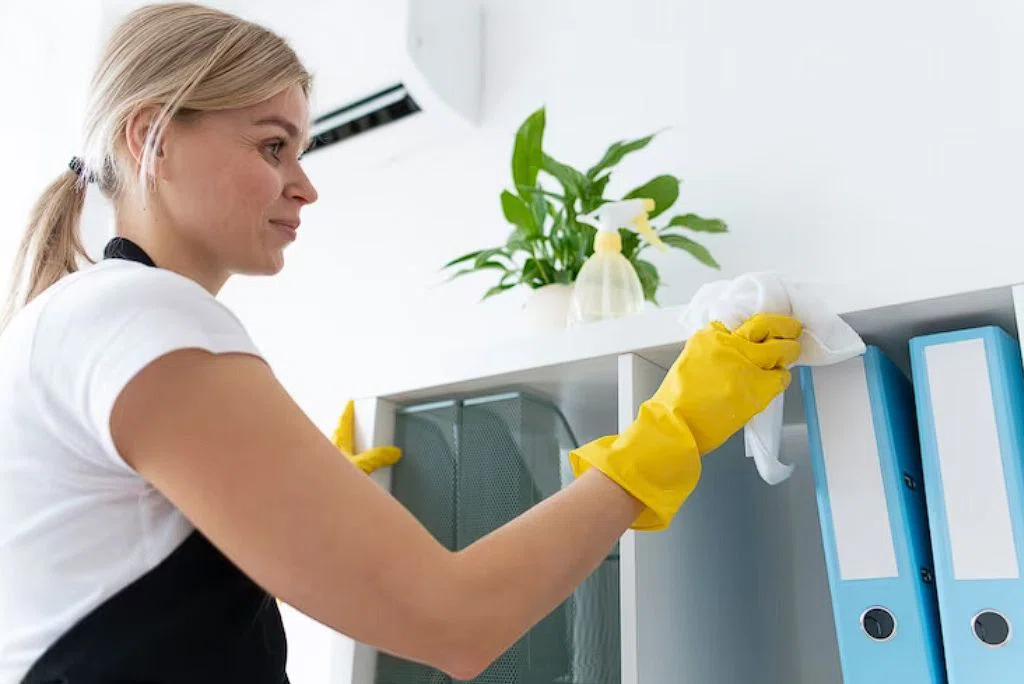
- Wipes for cleaning surfaces, walls, floors, windows and glass. These wipes are essential for cleaning surfaces and removing dust and dirt. It is recommended to use different cloths for different surfaces to avoid dust transfer.
- Stubborn heel cleaners like cleansers: they help from stubborn heels and dirt. Choose the right product depending on the type of soil and the surface to be cleaned.
- White spirit and acetone for removing paint stains: these products help to remove paint stains from various surfaces. In any case, make sure they are safe for the material you have to clean before using them.
- Vacuum cleaner: A vacuum cleaner is a useful tool for removing dust, hair and other small particles from floors and carpets. Choose a vacuum cleaner with the right accessories for best results.
- Retractable window brush: to keep your window panes clean, you'll need a special telescoping brush that allows you to easily reach all areas of the window.
- Microfiber cloth: this is a good choice for cleaning because microfiber removes dust and dirt from surfaces without the use of chemicals. In addition, these cups are easy to clean and reuse.
- Furniture leg pads: To avoid scratches and damage to floors when moving furniture, furniture leg pads are recommended. They protect your furniture and floors at the same time.
Getting rid of debris as well as unnecessary items
Before cleaning, it is recommended to get rid of large construction debris. If a large amount of garbage has accumulated after the renovation, it is better to turn to professionals by ordering a garbage removal service. However, if you decide to cope with this task yourself, you should evenly pack the garbage in bags, avoiding overfilling them so that they do not tear during removal. If the trash is dust-free, you can reuse the canvas bags by pouring the contents into the dumpster and taking new bags for the next load of trash.
It's also important to clear the renovated space of unnecessary items. Seasonal clothing, shoes and sports equipment, out-of-date accessories and other items that you no longer use or plan to give away or sell should not take up space in your home. Storing these items can cause dust to accumulate and create clutter. If you don't have a way to get rid of them permanently, you can take advantage of the storage services offered in Georgia. There are storage facilities in Tbilisi and other cities in Georgia where you can deposit any amount of stuff, from appliances and furniture to bicycles and car tires. Such services provide a warm and comfortable environment to keep your belongings safe for any length of time.
Cleaning and getting rid of unnecessary things are important steps that will help you create a cozy and orderly environment in your renovated home. Don't forget to pick up the necessary tools and supplies, as well as utilize storage services to make the process more efficient and comfortable.
Dusting all surfaces after renovation: secrets and pitfalls
An important task after the completion of repair work is the careful removal of dust from the floor, walls, furniture, windows, doors and other interior items. The cleaning process should begin with the ceiling, then go to the walls and windows, and finish the job by cleaning the furniture and floor, including baseboards. However, when performing this task, there may be some difficulties that are worth paying attention to:
- Difficulty dusting from under skirting boards and from corners and crevices: these areas require special attention and use a vacuum cleaner to effectively remove the dust. A vacuum cleaner with an attachment for narrow crevices and hard-to-reach places will do the trick. Pay attention to the metal mesh inside the nozzle to prevent small objects from falling into the vacuum cleaner. Dust and dirt in corners and crevices can harbor vermin such as bed bugs or dust mites. Therefore, it is especially important to thoroughly clean these areas to keep the room clean and hygienic.
- Caution when cleaning ceilings and freshly painted walls: when working on these surfaces, be especially careful not to scratch them. Use a vacuum cleaner attachment designed for gentler cleaning. If necessary, you can attach a soft brush to the nozzle to minimize the risk of damage. To prevent scratches and damage to freshly painted surfaces, it is recommended that you use additional protection such as masking tape or paper to keep walls and ceilings safe during the cleaning process.
- Use of microfiber cloths with an "anti-static" effect for more efficient cleaning: when cleaning surfaces, it is recommended to use microfiber cloths that have an anti-static effect. These dry rags reduce the adhesion of dust to surfaces, ensuring long-lasting results. Microfiber rags have the ability to penetrate the smallest pores and cracks, making them effective in removing not only dust, but also deeper contaminants such as fingerprints, stains or paint residue.
- Specifics of fine construction dust removal: a conventional vacuum cleaner is not always effective in removing fine construction dust. In such cases, it is recommended to remove it manually with damp cloths. This will avoid the dispersion of dust into the air and clean contaminated surfaces more thoroughly. It is worth noting that some construction materials may contain harmful substances or allergens, so using a mask and gloves when cleaning fine construction dust is a recommended precaution.
- Regular bag changes in your vacuum cleaner: if your vacuum cleaner is equipped with a bag, changing the bag regularly is essential for effective cleaning. Changing the bag frequently will help prevent dust from flying out of the vacuum cleaner's openings and keep its performance high. Nowadays, there are vacuum cleaners with cyclonic filtration system that do not require bag changes. These models provide longer run times without losing suction power and can be more convenient to use.
- Cleaning furniture covered with slipcovers: if furniture was covered with slipcovers during renovation, don't forget to dust them as well. Using a vacuum cleaner with an attachment for furniture and fabrics will help to effectively remove dirt and bring freshness back to the slipcovers. Furniture covers not only protect from dust and dirt during renovation work, but can also serve as a decorative element. Therefore, regular cleaning of the covers will help to maintain not only cleanliness, but also the aesthetic appeal of the interior.
Careful adherence to these tips will allow you to effectively and safely clean all surfaces after renovation, keeping your room clean and fresh.
Washing and cleaning
Once the renovation is done, it is important to remember to give your home a thorough cleaning and structural reorganization. There are a few pitfalls and using the right tools and techniques for effective cleaning and maintenance.
1. Roof: gives a finished look
Roof cleaning depends on the type of roof. PVC. If the color is very strong, you can use a soap solution, but do not use a stiff brush or sponge.
Modern technology also offers alternative roof finishes, such as mansard structures or translucent roofs that give rooms a typical round shape. Its cleaning properties are also ideal for installing this type of roofing.
2. Chandeliers, light fixtures, switches, outlets: safety first
Remember to turn off the power. This helps prevent possible injury or damage to electrical equipment. Schedule your cleaning for the first part of the day so that the lights will come on when you are finished cleaning.
Modern designs offer a wide variety of chandeliers and lights in all shapes and styles. Some models feature an automatic cleaning system that easily keeps your pendant light fixture clean and shiny for a long time.
3. Wall: different decorative surfaces are cleaner.
If the walls are painted or wallpapered, stains should be removed with a cloth and detergent. Selective cleaning is also recommended for decorative tiles. When using products suitable for a particular surface treatment, be careful not to damage the surface.
Near popular wall grids with voluminous elements such as panels, porcelain stoneware decorative elements. When working with such walls, it is recommended to use a soft cloth and clean it thoroughly to preserve the structure and appearance.
4. Tiles: clean and beautiful
When cleaning tile, it is important to remove any grout marks and stains left behind. It is recommended to vacuum the sidewalk before using a damp rag. Large chunks of mortar or tile adhesive can be easily removed with a wooden spatula, taking care not to scratch the surface. If primer stains remain on the tiles, you can try to remove them with acetone or a special tile cleaning chemical.
Tile not only becomes a practical solution for rooms such as bathrooms and kitchens, but also offers several design options. Some collections are known for their unique patterns, textures and effects to create a unique interior.
5. Furniture and sanitary ware: bring back shine and comfort
When cleaning furniture, sofas, armchairs, upholstered chairs, cabinets and drawers should be vacuumed, first cleaning the vacuum cleaner brush of construction dust. Wooden furniture can be wiped with a wet and dry cloth. After cleaning, it is recommended to use a polish, which will give the furniture an additional antistatic effect and give it a fresh look.
Sanitary fixtures should be cleaned with special products purchased in a regular store. To achieve maximum shine, you can use a vinegar-lemon solution. When cleaning acrylic bathtubs, you should use the softest sponge and avoid products with concentrated acids, alkalis and solvents, so as not to damage the surface.
Modern furniture offers a wide range of materials and designs. For example, upholstered furniture can be upholstered in various types of fabrics or leather with different shades and textures. Exquisite details and high quality materials make furniture not only functional, but also a stylish part of the interior.
6. Windows, doors and mirrors: clear and shiny
Glass panes should be cleaned with glass cleaning liquid and then dried to avoid streaks. You can use a microfiber cloth to clean the windows. If the windows were protected with a film, it is recommended to carefully remove it, and adhesive residue can be removed with absorbent cotton soaked in acetone. It is better not to clean the windows in bright sunlight to avoid noticeable streaks.
Glass is an important element of modern architecture and interior design. Modern building solutions increasingly use glass, which gives the room spaciousness and allows natural light to penetrate. Mirrors are also an integral part of interiors, adding depth and style to various rooms.
7. Floors: neat and effective cleaning
For painted wooden floors, it is recommended to use normal water when washing. With parquet or hardwood flooring, special cleaning products should be used, following the manufacturer's instructions. Laminate or vinyl floors can be wiped with a damp cloth with the addition of a mild detergent.
There are many different types of flooring available on the market today, including linoleum, carpet, tile, floor tiles, and innovative materials such as quartz vinyl or polyurethane flooring. They are not only functional, but also create a unique interior design.
8. Air purification: getting rid of dust and odors
Construction dust and odors can remain in the room after renovation. To improve air quality, you can use dust filters for vacuum cleaners and air purifiers. It is also recommended to ventilate the room and use natural air fresheners such as plants or essential oils.
Air purification technology continues to evolve, offering a variety of filters and systems to improve indoor air quality. Some air purifier models are equipped with sensors that monitor air pollution levels and automatically adjust the unit's operation.
Remember, when cleaning up after a renovation, it is important to be careful and neat to avoid damaging new finishes. If you have doubts or questions regarding the cleaning of specific surfaces, it is recommended to consult professionals or follow the recommendations of the manufacturers of materials and equipment.
Removing stains and specific contaminants: effective methods and benefits of professional cleaning services
When faced with heavy and ingrained dirt on the surfaces of a room, there are four effective tools that can be used:
- Steamer: the use of hot steam allows you to penetrate dried stains and facilitate their removal. Steam quickly penetrates pores and micro-cracks, effectively softening dirt.Recent developments in steamers allow the use of specialized nozzles and accessories that increase their effectiveness. For example, a nozzle with a concentrated steam stream can help remove even the most stubborn dirt.
- Construction hair dryer: this is ideal for removing dry dust and adhesives. The hair dryer heats up the dirt, making it easy to remove with a rag.Modern hair dryers now include temperature and airflow adjustment features, which allows for more precise and safer dirt removal. In addition, some models are equipped with filters that trap the smallest dust particles, preventing them from returning to the room.
- White spirit solvent: this product is excellent at removing almost any kind of dirt. However, it should be used with caution and only with the use of a respirator, as it contains chemicals. Currently, there are different types of solvents on the market, designed with environmental safety and efficiency in mind. For example, biodegradable solvents have emerged that are not only effective in removing contaminants but also less harmful to the environment.
- Boiling water: hot water is a simple but effective means of removing dried contaminants. The high temperature helps soften the dirt, speeding up the cleaning process. It is important to remember that not all surfaces and materials can withstand the effects of boiling water. Some delicate surfaces such as natural stone or wood can be damaged by high temperatures. Therefore, before using boiling water, it is important to check its safety for the specific surface.
The decision to clean on your own or hire professionals should be based on a number of factors
Let's look at the advantages and disadvantages of professional cleaning after renovation:
Advantages of professional cleaning:
- Professionalism: experienced professionals know how to effectively clean a room using specialized products and methods.
- Quality and safe chemicals for post renovation cleaning: professional cleaners usually use high quality and safe chemicals that effectively remove contaminants while minimizing the risk of damage to surfaces.
- Speed: thanks to their experience and knowledge of effective methods, specialist cleaning companies can carry out cleaning after renovation quickly and efficiently without compromising on the quality of the work.
- Responsibility: professional cleaners usually work responsibly and neatly. In addition, the contract often includes clauses related to possible damages, which provides additional protection for the owners of the premises.
- Additional services: many cleaning companies offer a wide range of additional services such as furniture arrangement, polishing and restoration of parquet and furniture, window cleaning, carpet cleaning and others.
The disadvantages of professional cleaning:
- Pre-booking: general cleaning after renovation requires a date and time to be agreed with the cleaning company in advance.
- High cost: a full cycle of professional cleaning can have significant costs, especially when additional services are included.
- Transfer of control: when hiring professionals, you need to entrust them with your home and valuables for the whole day or supervise each process to minimize the risk of damage to furniture or repairs. Modern cleaning companies are increasingly adopting technology, such as the use of robotic cleaning systems or monitoring and quality control systems. This makes the cleaning process more efficient and reliable, and provides additional safety for the owners of the premises.
In the end, the decision to clean on your own or hire professionals depends on your preferences, the availability of resources, and the complexity of the task. If you have the necessary knowledge and skills, as well as the time and resources to clean on your own, this may be a good option. However, if you are looking for high quality work, saving time and minimizing risks, it is better to entrust cleaning to professionals.
How to create a truly cozy nest after renovation
After completing the renovation and basic cleaning, you have a great opportunity to create a truly cozy nest. However, before you start arranging things, it's important to stop and avoid arranging unnecessary items. These can clutter up the space and hide a fresh renovation from you. One of the best ways to avoid this problem is to utilize storage services.
Principle of operation of storage services in Georgia
- The working principle of such services is usually very simple.
- You can place an order on the website with one click or contact them by phone.
- After that, a convenient date will be set when the service staff will come to your home.
- They will pack all your belongings themselves using different types of packaging that they will bring with them.
- Your belongings will then be delivered to the storage facility.
- You will be able to control all your things through a mobile app or a personal account on the website - it's a kind of virtual warehouse.
- When you need an item, you will simply make a return request and it will be delivered right to your home.
The pros of storing things in warehouses
- One of the main benefits of cloud storage after renovation is that it will be easier to keep your home clean and organized.
- The absence of unnecessary items will make it easy for you to take care of your home.
- All the things that are really important and necessary will always be at hand since you have gotten rid of everything unnecessary.
- Temporarily unused items will be securely packed and stored in a warm and ventilated warehouse.
- In addition, your home will have more space and freedom as you get rid of what is not yet relevant to you.
- This will allow you to enjoy the results of the renovation and use the extra space to decorate your home with different decorative items, rather than items that only take up space.
Such services can be particularly useful for temporary storage of seasonal items, as well as furniture and appliances that you are not using at the moment. Instead of taking up valuable space in your home, these items can be conveniently and securely stored in a specialized warehouse. This way, you can create an efficient storage system after your renovation, avoiding clutter and clutter.
Steps for quick and efficient cleaning after renovation
Now that you know the benefits of using storage services after renovation, let's look at how to clean your apartment after renovation in three simple steps to make it easy, fast and efficient.
Step 1- Make a plan and set yourself up for a good mood! Before you start cleaning, it is recommended to make a plan of action. Determine what tasks need to be done and divide them into smaller steps. This will help you structure the cleaning process and make it more manageable. Don't forget to put yourself in a positive and energetic mood to make cleaning easy and enjoyable.
Step 2- Purchase the necessary tools and get down to business. Before you start cleaning, make sure you have all the tools and materials you need. This may include buckets, rags, detergents, brushes, a vacuum cleaner, and other items that will be needed during the cleaning process. Purchasing all the necessary tools ahead of time will help you avoid delays and make your cleaning more efficient.
Step 3: Take advantage of a storage service and enjoy arranging your furniture and decor. After the basic cleaning and getting rid of unnecessary things, you can use a storage service. This will allow you to free up extra space and create a more cozy and functional environment in your home. Arrange your favorite furniture, decorate the space with decorative elements and enjoy the result of your renovation.
The bottom line is that by following these three steps, you'll be able to create a truly cozy nest after your renovation. Utilizing storage services will help you avoid clutter and freely manage the space in your home. Don't forget that cleaning up after a renovation is not only a physical process, but also an opportunity to enjoy your updated surroundings and create a space where you feel comfortable and cozy.
Frequently Asked Questions
🧹 What steps should I take to clean up after a cottage renovation?
Answer: The first step is to do a general cleanup, removing construction dust and leftover materials. Next, you should wash the floors, windows, walls, and surfaces. Don't forget to wipe and vacuum furniture and furnishings as well. Finally, do a final check and make sure all parts of the cottage are clean.
🧹 What materials and tools will you need for cleaning after the renovation?
You will need buckets, rags, detergents, brushes, vacuum cleaner, wet and dry rags, window cleaners, construction dust removers and other specialized cleaning products.
🧹 How to remove construction dust effectively?
Use a damp rag or microfiber to remove construction dust. Wipe all surfaces including walls, floors, windows and furniture. If the dust is heavily accumulated, you can also use a vacuum cleaner with a furniture attachment and brush.


7 comments
Log in to leave a comment
Советы, конечно, в статье стоящие, если уж совсем не получается с клинингом - воспользуйтесь ими!
Но я этот раз я скорей всего вызову клининговую компанию! Чтобы они мне помогли убраться! Но это ещё не точно!
автор, спасибо за статью, советы хорошие тут, пригодятся)
Мой опыт показывает, что важно не забывать о защите своего здоровья во время уборки после ремонта. Носите специальные защитные маски при сборе пыли и устранении строительного мусора, чтобы избежать попадания частиц в легкие. Кроме того, необходимо обратить внимание на безопасность и использовать перчатки и средства для уборки, чтобы предотвратить возможные травмы.
В целом, статья предлагает хорошие советы и подходы к уборке после завершения ремонта коттеджа. Уборка может быть трудной задачей, но ее правильное планирование и последовательное выполнение поможет сделать процесс более эффективным и приятным.